A Guide to Using Blue Gray Paint Colors

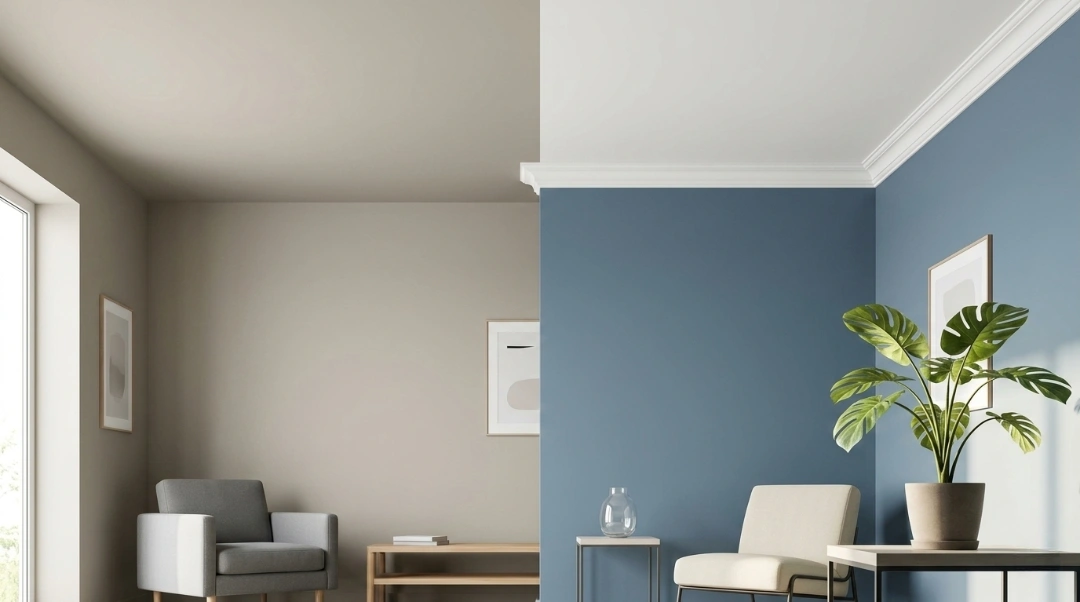
When it comes to creating a calm, elegant, and versatile aesthetic, blue-gray paint colors are a top choice for many homeowners. With their subtle blend of blue and gray tones, these colors strike the perfect balance between warmth and coolness, making them suitable for a variety of spaces and styles. If you’re looking to revamp your home’s interiors or exteriors with this timeless hue, you’re in the right place.

At Intercolor Painting, we specialize in helping Seattle homeowners choose the perfect paint colors for their spaces. In this guide, we’ll explore how to incorporate blue-gray paint into your home, popular shades to consider, and practical tips for making the most of this beautiful color family.

Why Choose Blue-Gray Paint Colors?

Blue-gray paint colors offer the best of both worlds:

  1. Timeless Elegance: These colors are classic and never go out of style, ensuring your home stays on-trend for years.
  2. Versatility: Blue-gray tones complement various design styles, from coastal and contemporary to traditional and industrial.
  3. Mood Enhancement: The cool undertones of blue-gray create a serene, soothing atmosphere, perfect for bedrooms, bathrooms, and living areas.
  4. Natural Inspiration: Inspired by stormy skies and ocean waves, blue-gray brings a touch of nature indoors, making your space feel grounded and refreshing.

How to Use Blue-Gray Paint Colors in Your Home

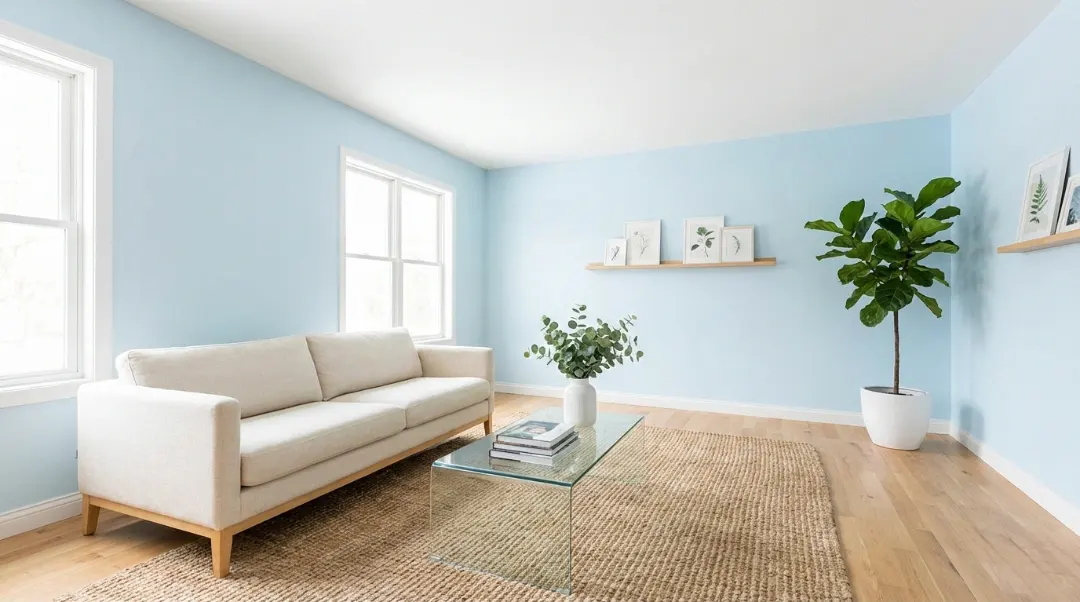
1. Living Room Sophistication

Blue-gray walls can transform your living room into a sophisticated retreat. Pair them with light-colored furniture, natural wood accents, and metallic finishes for a balanced, polished look. For added depth, consider an accent wall in a darker shade of blue-gray.

2. Bedroom Serenity

In the bedroom, blue-gray creates a peaceful environment ideal for rest and relaxation. Opt for softer shades like Benjamin Moore’s Wedgewood Gray or Sherwin-Williams’ Sea Salt to promote a cozy, inviting atmosphere. Pair with crisp white linens and textured throws to complete the look.

3. Bathroom Tranquility

Blue-gray is a popular choice for bathrooms due to its calming effect. Use it on the walls, cabinetry, or even the ceiling for a spa-like vibe. Complement the color with marble countertops, white tiles, and brushed nickel fixtures for a timeless appeal.

4. Kitchen Coolness

Blue-gray cabinets are a rising trend in kitchen design. They pair beautifully with white subway tiles, brass hardware, and quartz countertops. If you prefer a more understated look, use blue-gray as a backsplash color or paint your island in this hue for a subtle touch of sophistication.
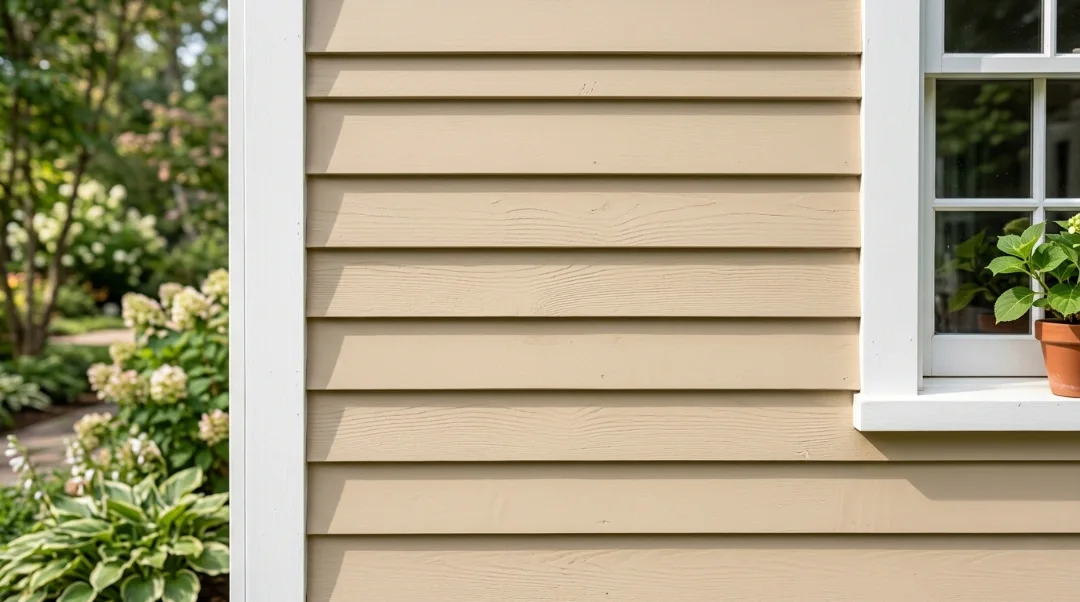
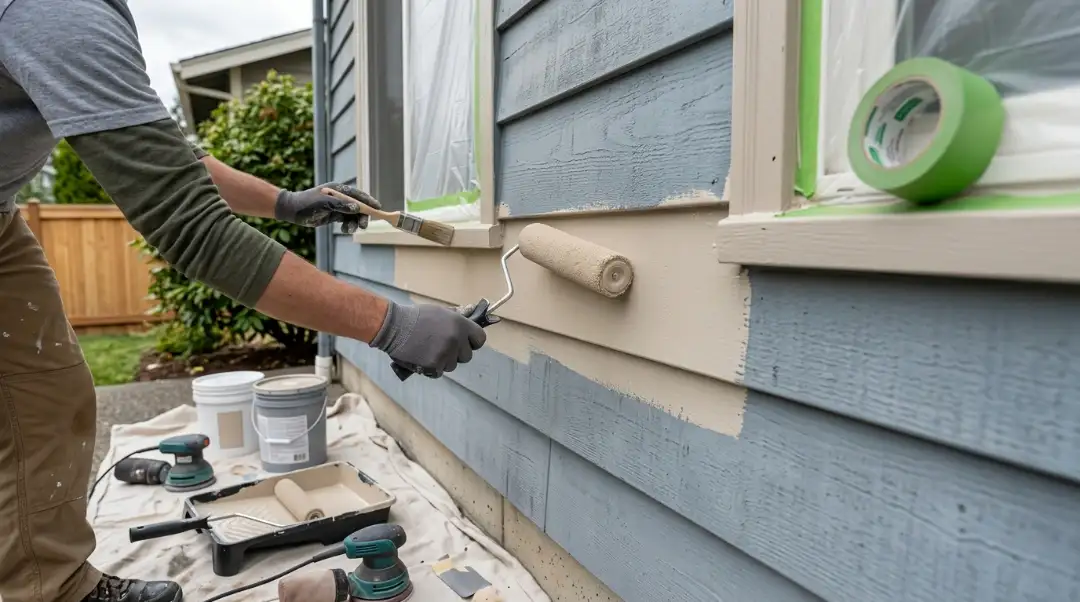
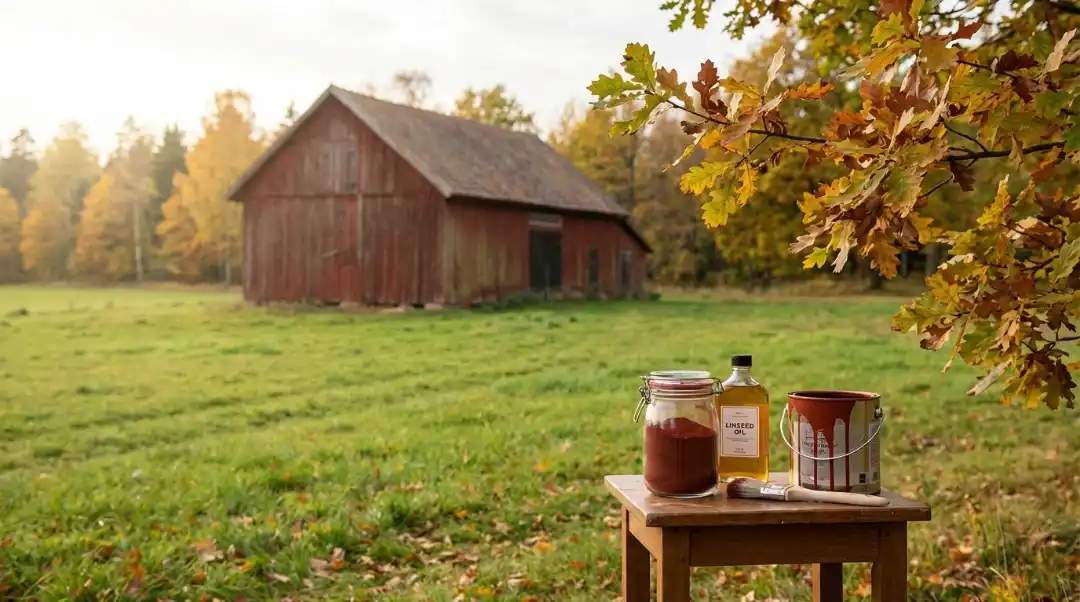
5. Exterior Appeal

Blue-gray is also a fantastic choice for exterior walls. Its neutral tones blend seamlessly with natural surroundings, making it an ideal option for homes in Seattle. Pair with white trim and darker shutters for a classic, cohesive look.

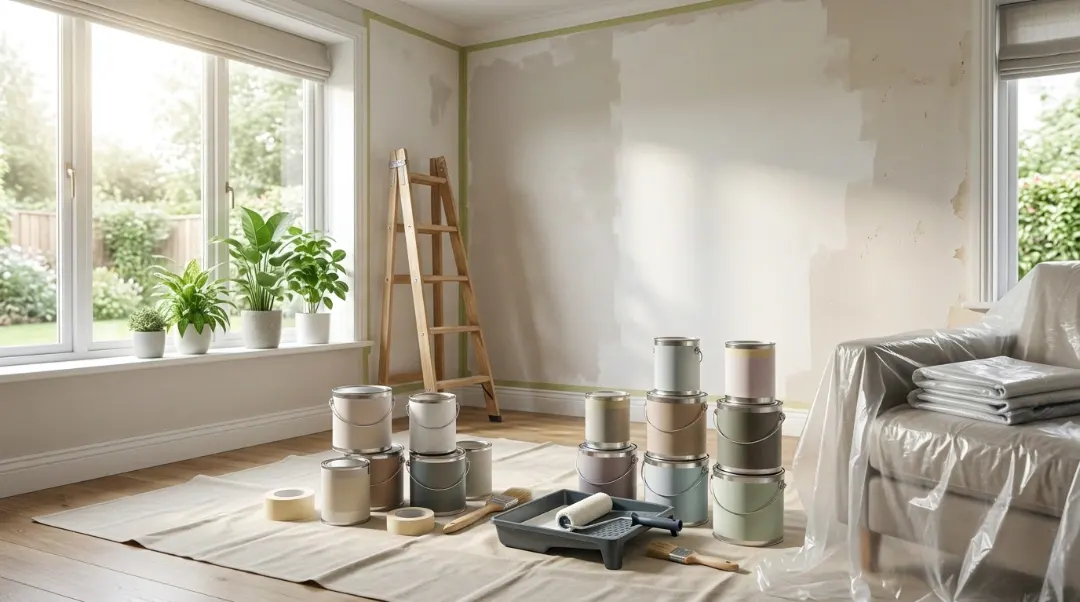
Popular Blue-Gray Paint Shades to Consider

When it comes to choosing the perfect blue-gray, here are some top-rated options loved by homeowners and designers alike:

  1. Benjamin Moore – Smoke
    A soft, muted blue-gray that works beautifully in living rooms and bedrooms.
  2. Sherwin-Williams – Misty
    A lighter, airy shade ideal for bathrooms and kitchens.
  3. Farrow & Ball – Parma Gray
    A sophisticated shade with slightly more blue, perfect for accent walls.
  4. Behr – Blueprint
    A bolder blue-gray with deep undertones, great for exteriors or statement cabinetry.
  5. Dunn-Edwards – Shoreline Cottage
    A neutral blue-gray that pairs effortlessly with a variety of color schemes.

Tips for Choosing and Pairing Blue-Gray Paint

Understand Undertones

Blue-gray colors can lean more toward blue or gray, depending on their undertones. Warm undertones pair well with cream and beige accents, while cool undertones complement whites and blacks.

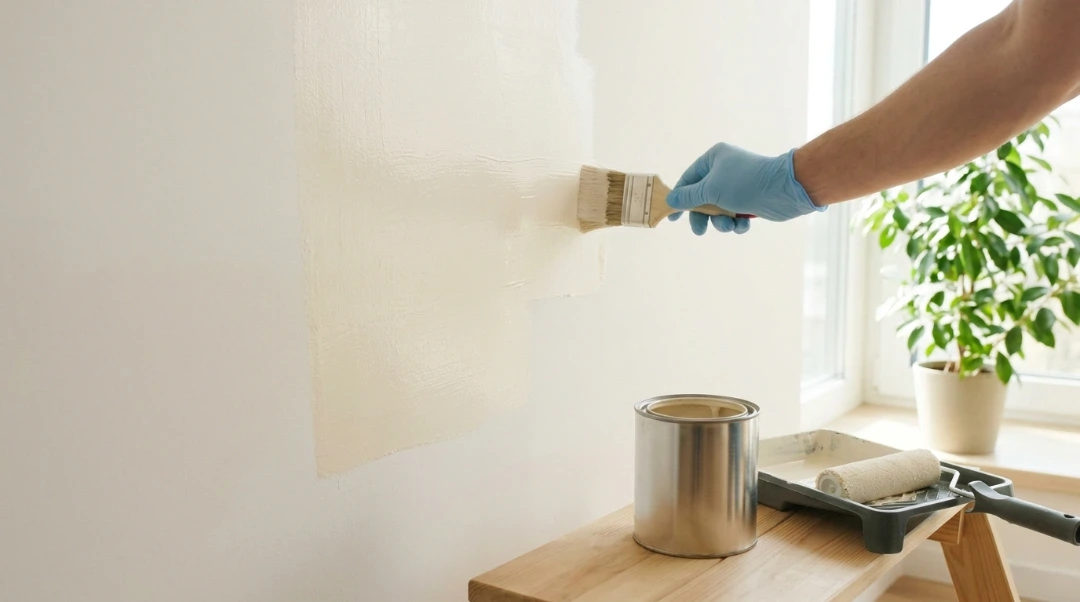
Test in Different Lighting

Natural and artificial lighting can significantly affect how blue-gray appears. Always test samples on your walls and observe them at different times of the day before committing to a color.

Pair with Neutral Colors

Blue-gray looks stunning when paired with neutral tones like white, beige, or charcoal gray. This combination creates a balanced, cohesive palette that feels both stylish and timeless.

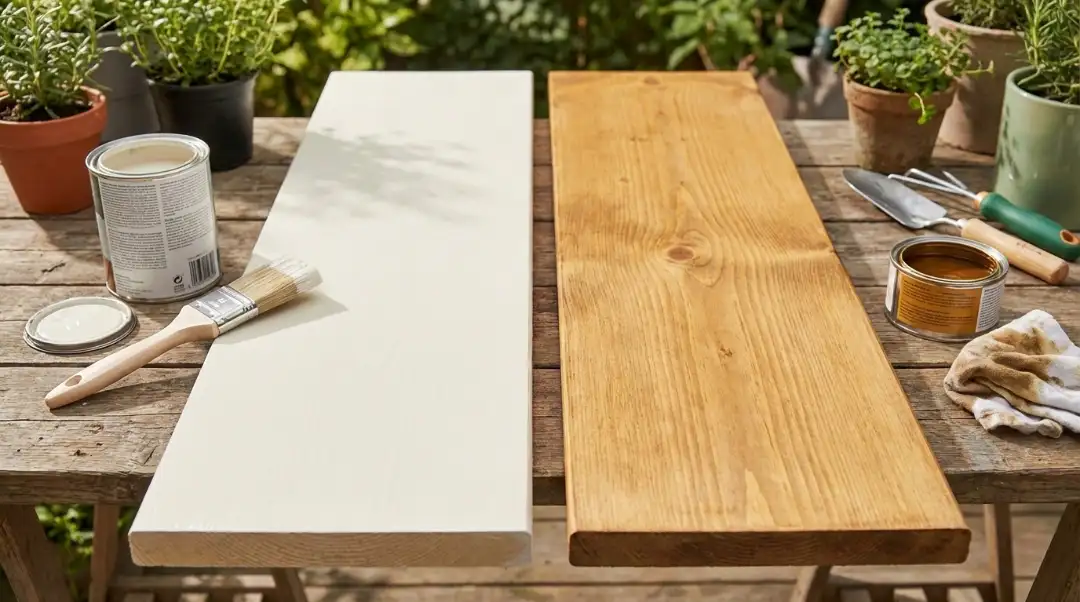
Add Texture and Contrast

Introduce textures like wood, rattan, or velvet to contrast with blue-gray walls. Metallic accents, such as brass or silver, add an extra layer of sophistication.

Why Seattle Homes Love Blue-Gray

Seattle’s unique blend of urban and natural environments makes blue-gray a perfect fit for homes in the area. The city’s often overcast skies and lush green surroundings allow blue-gray hues to shine without feeling too stark or overwhelming. At Intercolor Painting, we’ve helped countless Seattle homeowners bring their vision to life with these versatile shades.

Transform Your Space with Intercolor Painting

Choosing the right color for your home is just the first step. To achieve a flawless finish, you need expert painters who understand the nuances of color application. At Intercolor Painting, we pride ourselves on delivering top-notch painting services tailored to your needs.

  • Professional Expertise: Our team ensures every project is completed with precision and care.
  • Personalized Consultation: We help you choose the perfect blue-gray shade that complements your space and style.
  • Quality Assurance: From surface preparation to the final coat, we use premium paints and techniques to ensure lasting results.

Whether you’re refreshing a single room or repainting your entire home, we’re here to help.

Conclusion

Blue-gray paint colors are a versatile, timeless choice that can elevate the look and feel of any home. Whether you’re aiming for a serene bedroom, a modern kitchen, or an inviting exterior, these shades provide the perfect blend of sophistication and comfort.

Ready to transform your Seattle home with the beauty of blue-gray? Contact Intercolor Painting today for expert advice and professional painting services. Let us help you create a space that feels uniquely yours!

Looking for expert residential painter in seattleOur painting contractors seattle offers top-quality exterior house painter seattle and commercial painting seattleAs a trusted painting company in seattlewe transform spaces with precision and care.

Read More: How Much Does It Cost to Paint a House?

Search

Related Posts

What is a textured wall in a modern living room with a subtle plaster finish and natural light
Wall Texturing
James Carter

What Is a Textured Wall? A Complete Guide for Homeowners in 2026

You’ve touched a textured wall if you’ve ever run your hand over a wall and felt bumps, ridges, or a gritty surface. What is a textured wall, though, and why is it in practically every home in the U.S.?We at Inter Color Painting LLC recognize that picking the proper finish for your home is very important. The “smooth vs. textured” debate is a classic, whether you’re building a new house or patching up an old one. This guide will explain all you need to know about wall textures, from the old “orange peel” style to the new “knockdown” design. What Are Textured Walls Made Of? People also ask a lot of questions, and one of the most prevalent is, “What are textured walls made of?”Textured walls are usually manufactured from the same basic materials as regular drywall walls, but they include extra layers of texture. Drywall Compound / Joint Compound This is the most common material. It’s spread or sprayed onto drywall to create patterns like orange peel texture or knockdown texture. Plaster Walls Older homes often use plaster, which allows for more artistic, hand-crafted textures using trowel-applied texture techniques. Textured Paint Some wall paint texture products include sand or additives to create a subtle finish without heavy compound. Sheetrock Wall Texture Sheetrock is a brand of drywall, so sheetrock wall texture and textured sheetrock refer to textures applied directly to drywall panels. Why Do Builders Use Textured Walls? Builders don’t add texture to walls just because it looks interesting. There are practical reasons that have made textured walls popular for decades. Hiding Imperfections: The main reason builders like textured walls is that they cover faults. When you put up drywall, you have to tape and mud the joints between the panels. It takes a lot of time and skill to get these seams exactly smooth. Textured walls can hide little flaws, bumps, and dents that would be easy to see on a smooth wall. This is why wall texture is ideal for covering up flaws in new buildings and repairs. Cost Savings:Textured walls are cheaper and faster to put up than smooth walls because they don’t need to be as flawless. Skim coating is a method that involves putting a thin layer of joint compound over the whole wall to make it smooth. It takes a lot of time and skill. Builders can save time and money by skipping this phase and adding texture instead. This is something that homeowners typically have to pay for. Durability: Textured surfaces are more forgiving when it comes to everyday use. Textured walls hide little bumps and dings from furniture, doorknobs, and ordinary life better than smooth walls do. People really like them in places with a lot of foot traffic, including hallways and kids’ rooms. Sound Absorption: While not their primary purpose, textured walls can help absorb sound slightly better than smooth walls. The uneven surface breaks up sound waves more than a flat surface would.  Types of Textured Walls There isn’t just one “look” for texture. Depending on how the drywall compound is applied, you can get very different vibes. 1. Orange Peel Texture As the name suggests, this looks like the skin of an orange. It is a spray texture that creates small, rounded bumps. It’s durable and very common in modern suburban homes. 2. Light Knockdown Texture In 2026, a light knockdown texture is one of the most popular options. A specialist uses a flat knife to “knock down” the peaks after spraying the mud on the wall. This gives the surface a mottled, stucco-like texture that seems more expensive than orange peel. 3. Popcorn Texture This heavy texture was popular decades ago because it helped reduce noise. It is mostly found on ceilings. But a lot of homes are taking it down today since it collects dust quickly. 4. Sand Texture This involves mixing actual sand into the wall paint texture. It gives the wall a gritty feel, similar to a beach or a desert landscape. Pro Tip: If you want to try a DIY project, check out our guide on How to Texture a Wall with a Sponge. Textured Walls vs Smooth Walls Choosing between the two usually comes down to your budget and the “vibe” of your home. Feature Textured Walls Smooth Walls Cost More Affordable Expensive (requires more labor) Repairability Hard to match perfectly Easy to patch and sand Style Traditional/Rustic Modern/Minimalist Cleaning Catches dust; harder to wipe Very easy to clean If you are aiming for a sleek, gallery-style home, smooth is the way to go. If you want a cozy, lived-in feel that doesn’t show every thumbprint, texture is your best friend. Pros and Cons of Textured Walls The Pros: The Cons: Understanding Basic Wall Texture Types and Their Applications Choosing the right texture for different rooms can enhance both function and aesthetics. Living Rooms and Formal Spaces:Light knockdown or skip trowel textures are great for this room because they offer elegance without making it feel too busy. These textures, which are applied with a trowel, add visual interest that goes well with furniture and decor. Bedrooms: For bedrooms, orange peel or light knockdown textures are best. They are subtle enough to make the room feel quiet and cover up little flaws in the walls that could show up in harsh light. Bathrooms and Kitchens: These regions are prone to dampness, so texture that can disguise water spots or little damage is helpful. But stay away from surfaces with a lot of texture that hold moisture and are hard to clean. A light orange peel is good. Hallways and High-Traffic Areas: Knockdown texture is perfect for areas that take abuse. The pattern hides scuffs from furniture, luggage, or everyday bumps better than smooth walls. Home Offices: Consider your video call background smooth or very subtle texture often looks more professional on camera than heavy, dramatic textures. How to Texture a Wall (Basic Overview) Many homeowners search how to texture a wall or

Read More »
Woman painting a composite deck surface, showing can you paint Trex decking for faded outdoor boards
Deck Staining
James Carter

Can You Paint Trex Decking? A Complete Homeowner’s Guide

After years of sun and rain, your lovely Trex deck has started to fade. You want to know if a new coat of paint could bring it back to life. When their composite decking loses its shine, a lot of homeowners ask this question. The quick answer? It’s hard, and most of the time, you shouldn’t do it. Let’s look closely at whether  can you paint your Trex decking, what happens if you do, and other ways to make your deck seem better. What Is Trex Decking? Trex is a kind of composite decking that is manufactured by mixing plastic and reclaimed wood fibers. It is made to last longer than genuine wood and not decay, get bugs, break, or get wet. Capped vs. Uncapped Composite Decking Understanding this is critical before you think about painting Trex decking: Most problems people face with painting Trex decking happen because they don’t know which type they have. What Are the Benefits or Drawbacks of Painting Trex Decking? You need to think about the good and bad things of Trex paintable very thoroughly. You can’t readily change your mind about this. The Benefits The Drawbacks Can Trex Decking Be Painted Safely? This is one of the most common People Also Ask questions and the answer depends on age and condition. If you’re asking “is Trex paintable?”, the honest answer is: technically yes, practically risky. Things to Consider Before Painting Your Trex Deck You need to do a “splash test” before you start. Put some water on your deck. Does it soak up? If so, you have an ancient deck that doesn’t have a cap and is a fantastic candidate for paint. You have a modern-topped deck if the water beads up and rolls off. It’s considerably tougher to paint capped Trex decking because the plastic shell is made to keep paint and other things out. Moisture Resistance and Surface Tension Composite decks are made to be resistant to dampness. This is fantastic for keeping things from rotting, but it’s a nightmare for paint to stick to. You need a high-quality primer made just for non-porous surfaces if you want the paint to stick. How to Clean Trex Decking Before Painting You cannot paint over dirt, mildew, or pollen. If you do, the paint will peel off within weeks. Preparation is 90% of the job. For a step-by-step instruction on the best chemicals and tools to use, see our article on How to Clean a Deck Before Staining. Cleaning the surface properly makes sure that the composite surface treatment sticks to the material. How to Prepare Trex Decking for Paint or Stain Another important topic for PPA is how to get a Trex deck ready for paint or stain. This is what that truly means: Light Sanding Test Area Always paint a small hidden section first. Wait a few days to see if it bonds. Dry Conditions Paint only when the deck is completely dry and weather is stable. What Kind of Paint Works on Trex Decking? If you’re going to paint, choose carefully. Best Paint for Composite Decking Like Trex Avoid oil-based paints. They don’t flex well and fail faster on composite surfaces. Steps to Paint Trex Decking (If You Decide to Proceed) If you have an older, uncapped deck and you’re ready to transform it, follow these steps to ensure the best results. 1. Sanding (Lightly!) Lightly scratch the surface using 120-grit sandpaper. This makes “teeth” that the primer can hold onto. Don’t sand newer capped decks since you’ll damage the protective shell. 2. Apply a High-Quality Primer Don’t use a cheap primer. You need an oil-based or a high-adhesion acrylic primer. This is the most important step in how to paint trex decking. 3. Choose the Best Paint A high-quality, solid-color acrylic deck stain or a “deck restorer” product is the ideal paint for composite decking like Trex. These are made to be flexible. The paint needs to be able to stretch without breaking since the deck moves when the temperature changes. 4. Application Use a brush for the gaps and a roller for the surface. Work in small sections to ensure an even coat. 5. Drying Time Patience is key. If you walk on it too soon, you’ll leave permanent footprints. You might be wondering, How Long Does Deck Stain Take to Dry? Typically, you should wait at least 24 to 48 hours before moving furniture back. Why Composite Decking Should Not Be Painted This deserves its own section because it’s the core reason professionals avoid it. This is why you shouldn’t paint modern Trex decking, even if it looks worn. Is Painting Trex Decking Worth It vs. Replacing? For most homes, replacement or restoration wins. Painting Trex decking: Replacing boards: Why Choose Us We at Inter Color Painting LLC believe in doing what’s best for your home, not just what’s easiest. Before any work starts, we assist homeowners in figuring out if painting, staining, or restoring is the best option.Our team has actual experience, honest advice, and proven outcomes if you’re seeking reliable Deck Staining Contractors in Seattle WA. Conclusion If you’re still not sure if painting, staining, or restoring your Trex deck is the best thing to do, seeking help from a professional can save you time and money. At Inter Color Painting LLC, we are glad to look at your deck and suggest the best long-term fix based on how old it is, how well it is maintained, and whether or not it is still under warranty. Contact us today to set up a meeting and get honest, professional advice that is specific to your house and yard. FAQs Can Trex decking be painted safely? Yes, the material is safe as long as you use water-based or suggested oil-based products. It doesn’t hurt the boards’ structural integrity. Does painting Trex decking void the warranty? Most of the time, painting the boards will void the fade and stain warranty on newer Trex products, including the Transcend series.

Read More »
Painting Tips
Roman Raees

How to Remove Arylic Paint

Have you ever been painting and suddenly noticed a big splash of acrylic paint on your favorite shirt? Or maybe you were working on a fun art project and now there’s paint all over your hands, carpet, or wooden table? Don’t worry – you’re not alone! Acrylic paint spills happen to everyone, from professional artists to weekend crafters. The good news is that most acrylic paint stains can be removed if you know the right tricks. In this complete guide, we’ll show you exactly how to get acrylic paint out of almost any surface. Whether the paint is still wet or has been dried for days, we’ve got solutions that actually work. We’ll cover everything from simple household items you already have to more advanced techniques for stubborn stains. By the end of this article, you’ll be a pro at acrylic paint removal and won’t panic the next time a spill happens. Let’s dive in and save your stuff! Understanding Acrylic Paint Before you try to wash off acrylic paint, you have to understand what it actually is. Acrylic is a water-based paint, but that is a bit of a trick. While it’s wet, it’s easy to handle. However, as it dries, it undergoes a chemical change called “cross-linking.” The acrylic polymer emulsion inside the paint turns into a flexible polymer film. This is essentially a layer of plastic. The copolymers in the paint create a bond that becomes water-resistant very quickly. In fact, the hardening time (30-60 minutes) is remarkably fast. If you don’t act within that window, you are no longer just washing you are trying to dissolve acrylic paint or strip acrylic paint entirely. Emergency Response Guide When you spill acrylic paint, the first few minutes are crucial. Acting fast can mean the difference between a quick cleanup and a permanent stain. Here’s your emergency action plan: Step 1: Don’t Panic, Don’t Rub The moment you notice paint on something, stop what you’re doing. Your first instinct might be to rub it away, but this actually makes things worse. Rubbing pushes the paint deeper into fabric fibers or spreads it across surfaces. Instead, stay calm and move to step two. Step 2: Blot Immediately Grab a clean cloth, paper towel, or even a napkin. Gently blot the paint stain from the outside edges toward the center. This prevents the stain from spreading. Keep blotting until you’re not picking up any more paint. If it’s on clothing, hold a clean cloth behind the stain while you blot from the front. Step 3: Rinse With Cold Water For fabrics and washable items, run cold water through the back of the stain. This pushes the paint out the way it came in. Hold the fabric under running water for at least 30 seconds. Don’t use hot water – it can actually create a heat-set stain that becomes permanent. Step 4: Apply Soap Work some regular dish soap or laundry detergent into the damp area. Gently massage it in with your fingers or a soft brush. Let it sit for 2-3 minutes, then rinse again. Repeat this process until the water runs clear. Essential Supplies to Keep Handy Smart painters always keep an emergency cleanup kit nearby. Here’s what you should have: Having these items within reach means you can tackle acrylic paint stain removal before it becomes a bigger problem. At Inter Color Painting LLC, we always tell our clients that preparation prevents permanent stains. Complete Solvent Guide Not all paint removers work the same way. Some are gentle and safe for delicate fabrics, while others are strong enough to strip acrylic paint from hard surfaces. Let’s break down your options from mildest to strongest. Household Solutions These everyday items work great for fresh paint and are safe for most surfaces: Soap and Water This is your first line of defense. Regular dish soap contains degreasing agents that break down the acrylic polymer. Mix warm water with a few drops of soap, apply it to the paint stain, and scrub gently. This works best within the first hour of a spill. Rubbing Alcohol Also called isopropyl alcohol, this is one of the best tools for removing dried acrylic paint. It dissolves the polymer film without being too harsh. Pour some on a cloth and dab at the stain. You’ll see the paint start to break down within a few minutes. This works on fabric, hard surfaces, and even your hands. White Vinegar Vinegar’s acidity helps soften acrylic paint. Heat a cup of white vinegar in the microwave for 30 seconds (not boiling), then apply it to the stain with a cloth. Let it soak for 5-10 minutes before scrubbing. This is especially good for natural textile fibers like cotton. Baby Wipes These are surprisingly effective for cleaning acrylic paint off your hands and quick surface cleanups. They’re gentle on skin and contain mild cleaning agents. Keep a pack in your painting area for immediate response to small spills. Moderate Strength Options When household items aren’t enough, try these: Ammonia Solution Mix one part ammonia with one part water. This combination dissolves acrylic gradually and works well on stubborn stains. Apply it to the paint stain, wait 10-15 minutes, then scrub with a brush. Always use ammonia in a well-ventilated area and never mix it with bleach – this creates toxic gas. Nail Polish Remover (Acetone-Free) Look for acetone-free formulas when dealing with fabric fibers or synthetic fabrics. These are gentle enough for clothes but strong enough to remove dried acrylic paint. Apply with a cotton ball and blot repeatedly. The acetone-free version won’t damage delicate materials. Window Cleaner Many window cleaners contain organic solvents that work on acrylic. Spray it on the paint stain, let it sit for a minute, then wipe away. This works well on glass, tile, and hard floors. Strong Solvents (Use With Caution) For really stubborn or old paint stains: Acetone This is one of the most powerful solvents for acrylic paint removal. It works

Read More »
Does Paint Expire? Testing old and new paint cans for usability, showing signs of expired paint like lumps and separation.
house painters
Roman Raees

Does Paint Expire? How to Know If Your Paint Is Still Good

Paint is a common item in many homes, but have you ever found a can in your closet or garage and wondered, “Does paint expire?” Using paint that has gone bad can lead to streaky finishes, uneven color, or even wasted money. Understanding how long paint lasts, recognizing the signs of expired paint, and knowing how to store paint properly can save you time and frustration. In this guide, we’ll cover everything you need to know about paint longevity, including latex vs oil-based paint lifespan, paint storage tips, and simple tests like the paint smell test and paint consistency check. Whether you’re painting a single wall or renovating a whole room, this guide will help you get professional-quality results while making the most of your supplies. How Long Does Paint Last? When it comes to paint, knowing how long it lasts is essential. Paint doesn’t last forever, but its lifespan depends on the type of paint, how it was stored, and whether the can has been opened. Latex Paint Longevity Latex paint is water-based and widely used indoors. Unopened, it can last up to 10 years. Once opened, latex paint typically remains usable for 2–5 years, provided it’s stored properly. Factors like repeated opening, temperature fluctuations, and exposure to air can reduce its lifespan. Oil-Based Paint Lifespan Oil-based paints generally last longer. An unopened can may remain good for 15 years or more, and opened cans can last 5–10 years. Oil-based paints resist separation and mold better than latex paints but still require proper storage to maintain their quality. Specialty Paints Chalk, metallic, textured, or paint with additives may have shorter shelf lives. Always check the manufacturer’s recommendations to determine usability. Factors Affecting Paint Longevity Several conditions can impact paint shelf life: Understanding these factors helps ensure your paint remains usable for longer. Signs Your Paint Has Gone Bad Even if your paint hasn’t technically reached its “expiration date,” it might still be bad. Here are key expired paint signs to look for: Recognizing these signs early can save you time and money while ensuring your painting projects look professional. How to Tell If Your Paint Has Expired Determining whether paint is still good requires a few simple checks. Stir and Observe Use a clean stir stick to mix the paint. Watch for chunks or films that don’t dissolve. This indicates the paint has broken down. Test on a Small Surface Pour a small amount on cardboard or scrap wood. If it dries streaky, uneven, or clumpy, it’s expired and should not be used. Smell and Color Check If the paint has an off-color or sour smell, it’s likely unusable. Paint that smells fresh and mixes smoothly is usually still good. Using the Paint Consistency Check Check the viscosity of the paint. If it’s too thick or too watery, the chemical composition has likely degraded. By performing these tests, you can confidently determine whether old paint is safe to use. What Happens If You Use Expired Paint Using paint that has gone bad may seem harmless, but it often causes problems. Poor Coverage Expired paint doesn’t spread evenly, meaning you’ll need more coats than usual. This leads to streaky or patchy results. Weak Adhesion Old paint may peel, flake, or chip sooner than fresh paint, reducing the durability of your work. Uneven Texture Paint that is past its prime may dry bumpy, streaky, or rough, especially high-gloss finishes. Wasted Time and Money Using expired paint might save money initially, but repainting due to poor coverage or adhesion ends up costing more. Knowing the consequences of using expired paint helps homeowners make smarter decisions about when to keep or replace old cans. Can You Revive Old Paint? Sometimes, old paint can be brought back to life, but only if it hasn’t gone completely bad. Stir and Mix Most separation issues can be fixed by thorough stirring. Scrape the sides and bottom of the can for best results. Strain the Paint If small clumps remain, strain the paint through a mesh filter into a clean container. This removes debris and hardened bits. Test Before Full Use Always apply a small amount to cardboard or a scrap surface. If the finish is smooth and color is even, the paint can be used. When Not to Revive Paint with mold, strong odor, or large chunks should be discarded. Reviving it rarely works and may lead to poor results. By carefully testing and occasionally reviving older paint, you can save a few cans while ensuring your project looks professional. How to Store Paint to Make It Last Longer Proper storage is the key to extending paint life and avoiding wasted product. Common Mistakes When Storing Paint Even with careful storage, mistakes can shorten paint life: Avoiding these mistakes helps maximize paint longevity and ensures professional results. Conclusion Paint does expire, but with proper care, you can extend its life and avoid wasted products. Understanding paint longevity, recognizing expired paint signs, and following proper paint storage tips ensures your next painting project looks flawless. Whether you’re using latex or oil-based paint, performing simple checks like the paint consistency check and paint smell test will help you determine if old paint is usable. For expert guidance or professional services, the team at Inter Color Painting LLC is ready to help. You can also Contact Us to get advice on paint selection, storage, or any upcoming project. With the right knowledge and preparation, your paint will last longer and deliver better results every time. FAQs What happens if we use expired paint? Using expired paint can lead to poor coverage, streaks, weak adhesion, and peeling. It may dry unevenly or flake, ruining your finish. Paint with mold, bad odor, or clumps should never be used. Always test small areas first or replace old cans to ensure quality results. How do you know if paint is expired? Check paint for clumps, separation that won’t mix, mold, off-color, or sour odor. Stir the paint and perform a small patch

Read More »
How much does a gallon of paint weigh
interior painting services
Roman Raees

How Much Does a Gallon of Paint Weigh

When you’re planning a paint job, most people think about color, coverage, and cost. But there’s one detail that often gets overlooked: how much does a gallon of paint weigh. Knowing the weight matters if you’re lifting heavy cans, carrying them up stairs, or shipping paint to a job site. It also helps you plan for safety, especially if you’re moving several gallons at once. In this guide, we’ll break down paint weight in an easy-to-understand way, explain why it varies, and show how to convert gallons to pounds. What Does a Gallon of Paint Weigh? A standard US gallon of paint weighs between 10 and 12 pounds (4.5 to 5.4 kg). The average weight of paint is typically cited as 11 pounds per gallon. This is significantly heavier than a gallon of water, which weighs exactly 8.34 pounds. When we talk about the US Gallon of Paint Weigh, we are referring to a volume of 3.78 liters. However, the Average Gallon of Paint Weigh changes based on the “solids” inside the can. Paint is a mixture of pigments, binders, and solvents. High-quality paints often have a higher density of paint because they contain more pigments like titanium dioxide, which is quite heavy. When we talk about the paint weight per gallon, we are looking at the sum of its parts. High-quality paints usually have a higher density of paint because they contain more “solids” the stuff that actually stays on your wall after the liquid dries. If a can feels unusually light, it might be a sign that it has more water and fewer of the high-quality ingredients that provide great coverage. Weight by Paint Type The type of paint weight can vary quite a bit depending on what the paint is designed to do. Since different projects require different chemicals, the weight on the scale will change based on the base of the paint. Latex and Acrylic Paints These are the most common paints used for home interiors today. They are water-based, which makes them easier to clean up. Oil-Based Paints Many people think oil-based paint would be heavier because it feels “thicker,” but science tells a different story. Oil is actually less dense than water. Specialty and Industrial Coatings If you are working on a garage floor or a waterproof basement, you might use an Elastomeric or Epoxy paint. Factors That Affect Paint Weight Why is it that two cans of the same brand might weigh differently? Several paint weight factors change the density of the liquid inside. Paint Composition: Pigments, Binders, and Solvents Every gallon is a recipe. The paint composition is the biggest factor. The Impact of Color Believe it or not, color matters! A gallon of “Bright White” paint often weighs more than a gallon of “Deep Black.” This is because the paint ingredient impact on weight is tied to the minerals used. White paint requires a lot of titanium dioxide, which is very heavy. Darker colors use carbon-based pigments that are much lighter. Interior vs. Exterior Paint Weight When comparing interior vs exterior paint weight, exterior paints often come out as the heavyweights. They include extra additives to protect your home from UV rays, mold, and rain. These protective chemicals increase the overall mass of the liquid. Read More: How Much Does a Gallon of Paint Cover? How to Convert Gallons to Pounds If you are a professional contractor or someone planning a large renovation, you might need to do some math. Knowing the gallons to pounds conversion is essential for figuring out if you are overloading a shelf or a vehicle. To get a quick estimate, you can use the “11-Pound Rule”: For a more technical approach, pros look at the Safety Data Sheet (SDS). This sheet lists the “Specific Gravity.” If you multiply the Specific Gravity by 8.34, you will get the exact weight of that specific brand. If all this math makes your head spin, don’t worry! You don’t have to do it alone. At Inter Color Painting LLC, we handle all the technical details so you don’t have to. If you are ready to start your project without the stress of logistics, feel free to Contact Us for a professional consultation. Final Thoughts At the end of the day, knowing how much does a gallon of paint weigh helps you understand the quality of what you are buying. Weight is often a sign of “solids,” and more solids mean a better, longer-lasting paint job. Whether you are carrying a single can or a dozen 5-gallon buckets, being prepared for the weight will save your back and your project. If you need help planning a painting project, estimating materials, or handling heavy paint safely, Inter Color Painting LLC is here to help. For professional guidance and services, feel free to Contact Us and we’ll assist you with your project. FAQs How much does a 5 gallon paint bucket weigh? A 5 gallon paint bucket weighs about 50 to 60 pounds. Most paints weigh around 10–12 pounds per gallon, so the total weight depends on the paint type. How much does 1 gallon of paint thinner weigh? One gallon of paint thinner weighs about 6 to 7 pounds. It is lighter than paint because it does not contain pigments or binders. Does paint weigh less after it dries? Yes, paint weighs less after it dries. As paint dries, the water or solvents evaporate, leaving only the solid materials on the surface. Why do painters add water to paint? Painters add water to paint to improve flow and make application smoother. A small amount helps paint spread evenly, but too much water can weaken the finish.

Read More »
house painters
Roman Raees

How to Clean Walls with Flat Paint: Best Cleaning Method

Cleaning your home is a big job, but cleaning flat paint walls is a whole different story. Flat paint looks beautiful because it is smooth and does not shine. However, this matte finish is also very delicate and porous. If you scrub too hard, you might ruin the look of your room forever. Many homeowners feel scared when they see a scuff mark on a flat wall. They worry that wiping it will leave a permanent shiny spot. At Inter Color Painting LLC, we know that keeping your walls fresh is part of loving your home. This guide will teach you exactly how to clean flat paint walls without causing any damage. We will share professional secrets to keep your matte surfaces looking like they were just painted yesterday. How to Determine if You Have Flat Finish Walls Before you grab a bucket of water, you need to be sure about your paint type. Knowing the difference between flat and other finishes like eggshell or semi-gloss is the first step in cleaning flat paint walls. Flat paint is often used on ceilings or in low-traffic areas like formal dining rooms. It is famous for hiding bumps and cracks in the drywall because it does not reflect light. However, this same quality makes flat paint cleaning tips different from those for shiny paints. To test your finish, you can use the “Flashlight Test.” Turn off the main lights in the room and hold a flashlight flat against the wall. Shine the light across the surface from the side. If the light disappears into the paint and you see no reflection, you have a flat or matte finish. If you see a slight glow or a soft reflection, you might have eggshell paint. If the wall looks like a mirror and shows a bright glare, it is likely semi-gloss or gloss. Flat paint feels a bit chalky or rough to the touch compared to the slick feel of a kitchen cabinet. Another way to tell is by looking at the wall from a sharp angle. Stand near the corner of the room and look toward the window. If the wall stays dull and dark even where the sun hits it, it is definitely flat. This “non-reflective” property comes from the high amount of pigment and low amount of resin in the paint. Because there is less resin to protect the pigment, the surface is more open to the air. This is why you must use gentle wall cleaning solutions. If you treat flat paint like it is a shiny kitchen wall, you will rub away the pigment, leaving a “burnished” or shiny spot that cannot be fixed with a cloth. Getting Started — Gather Your Cleaning Supplies Success starts with having the right cleaning supplies for walls. You cannot just use any old rag or a harsh chemical from under the sink. Because flat paint is so porous, it can soak up liquids and chemicals, which leads to staining. To clean flat paint walls safely, you need tools that are soft and non-abrasive. First, you will need two large buckets. One bucket will hold your cleaning solution, and the other will hold clean, warm water for rinsing. Using two buckets prevents you from putting dirty water back onto your clean walls. For your cleaning cloths, only use white microfiber towels or soft sponges. Colored rags can sometimes bleed dye onto your light-colored walls, creating a mess that is even harder to fix. The most important supply is a high-quality, mild dish soap. Something like Dawn is perfect because it breaks down oils without being too acidic or basic. You should also have white vinegar and baking soda on hand for tougher spots. Avoid “heavy-duty” cleaners, bleach, or anything with grit. These will act like sandpaper on your matte finish. Here is a quick checklist of everything you should have ready: Setting up your station correctly will save you time and prevent accidents. Lay down a drop cloth or old towels on the floor to catch any drips. Even though you are using gentle wall cleaning solutions, you don’t want soapy water sitting on your hardwood or carpet. By being prepared, you ensure the best cleaning method for flat paint is followed from start to finish. This level of care is exactly what Inter Color Painting LLC recommends for every homeowner. Clean Flat Paint Walls When you are ready to clean flat paint walls, you must change your mindset. This is not like scrubbing a floor. You are “lifting” dirt, not “grinding” it out. The golden rule is to use the least amount of moisture and the least amount of pressure possible. Many people make the mistake of soaking the wall, but flat paint can actually “bubble” or peel if it gets too wet for too long. Start by asking yourself: how do you wash walls painted with flat paint without making them look patchy? The answer is to work in small sections. Focus on one square foot at a time. This allows you to control how much water stays on the wall and ensures you can dry it quickly. If you try to do the whole wall at once, the soap might dry on the surface, leaving behind a dull film or streaks that are very hard to remove. Before any water touches the paint, you must dust flat paint walls. This is a step most people skip, but it is the most important. If you apply water to a dusty wall, you will create “mud” that gets pushed into the pores of the paint. Use your vacuum’s soft brush attachment to gently sweep the wall from top to bottom. Pay extra attention to the corners where cobwebs hide. If you don’t have a vacuum, a clean, dry microfiber cloth works wonders. Finally, always perform a “spot test.” Find a hidden area, like behind a door or a piece of furniture, and try your cleaning method there first. Let it dry

Read More »

James Carter

James Carter is an experienced painter who has been providing excellent residential and business painting services in the Seattle area for more than 15 years. James is dedicated to changing places with care and precision. He knows a lot about color theory, how to prepare surfaces, and eco-friendly finishing procedures. He is in charge of a team at Seattle Painting Experts that is dedicated to high-quality work, finishing projects on schedule, and making customers very happy. James also gives homeowners useful painting techniques and expert guidance so they can make smart choices and feel good about taking care of their investment.

Related Posts

What is a textured wall in a modern living room with a subtle plaster finish and natural light
Wall Texturing
James Carter

What Is a Textured Wall? A Complete Guide for Homeowners in 2026

You’ve touched a textured wall if you’ve ever run your hand over a wall and felt bumps, ridges, or a gritty surface. What is a textured wall, though, and why is it in practically every home in the U.S.?We at Inter Color Painting LLC recognize that picking the proper finish for your home is very important. The “smooth vs. textured” debate is a classic, whether you’re building a new house or patching up an old one. This guide will explain all you need to know about wall textures, from the old “orange peel” style to the new “knockdown” design. What Are Textured Walls Made Of? People also ask a lot of questions, and one of the most prevalent is, “What are textured walls made of?”Textured walls are usually manufactured from the same basic materials as regular drywall walls, but they include extra layers of texture. Drywall Compound / Joint Compound This is the most common material. It’s spread or sprayed onto drywall to create patterns like orange peel texture or knockdown texture. Plaster Walls Older homes often use plaster, which allows for more artistic, hand-crafted textures using trowel-applied texture techniques. Textured Paint Some wall paint texture products include sand or additives to create a subtle finish without heavy compound. Sheetrock Wall Texture Sheetrock is a brand of drywall, so sheetrock wall texture and textured sheetrock refer to textures applied directly to drywall panels. Why Do Builders Use Textured Walls? Builders don’t add texture to walls just because it looks interesting. There are practical reasons that have made textured walls popular for decades. Hiding Imperfections: The main reason builders like textured walls is that they cover faults. When you put up drywall, you have to tape and mud the joints between the panels. It takes a lot of time and skill to get these seams exactly smooth. Textured walls can hide little flaws, bumps, and dents that would be easy to see on a smooth wall. This is why wall texture is ideal for covering up flaws in new buildings and repairs. Cost Savings:Textured walls are cheaper and faster to put up than smooth walls because they don’t need to be as flawless. Skim coating is a method that involves putting a thin layer of joint compound over the whole wall to make it smooth. It takes a lot of time and skill. Builders can save time and money by skipping this phase and adding texture instead. This is something that homeowners typically have to pay for. Durability: Textured surfaces are more forgiving when it comes to everyday use. Textured walls hide little bumps and dings from furniture, doorknobs, and ordinary life better than smooth walls do. People really like them in places with a lot of foot traffic, including hallways and kids’ rooms. Sound Absorption: While not their primary purpose, textured walls can help absorb sound slightly better than smooth walls. The uneven surface breaks up sound waves more than a flat surface would.  Types of Textured Walls There isn’t just one “look” for texture. Depending on how the drywall compound is applied, you can get very different vibes. 1. Orange Peel Texture As the name suggests, this looks like the skin of an orange. It is a spray texture that creates small, rounded bumps. It’s durable and very common in modern suburban homes. 2. Light Knockdown Texture In 2026, a light knockdown texture is one of the most popular options. A specialist uses a flat knife to “knock down” the peaks after spraying the mud on the wall. This gives the surface a mottled, stucco-like texture that seems more expensive than orange peel. 3. Popcorn Texture This heavy texture was popular decades ago because it helped reduce noise. It is mostly found on ceilings. But a lot of homes are taking it down today since it collects dust quickly. 4. Sand Texture This involves mixing actual sand into the wall paint texture. It gives the wall a gritty feel, similar to a beach or a desert landscape. Pro Tip: If you want to try a DIY project, check out our guide on How to Texture a Wall with a Sponge. Textured Walls vs Smooth Walls Choosing between the two usually comes down to your budget and the “vibe” of your home. Feature Textured Walls Smooth Walls Cost More Affordable Expensive (requires more labor) Repairability Hard to match perfectly Easy to patch and sand Style Traditional/Rustic Modern/Minimalist Cleaning Catches dust; harder to wipe Very easy to clean If you are aiming for a sleek, gallery-style home, smooth is the way to go. If you want a cozy, lived-in feel that doesn’t show every thumbprint, texture is your best friend. Pros and Cons of Textured Walls The Pros: The Cons: Understanding Basic Wall Texture Types and Their Applications Choosing the right texture for different rooms can enhance both function and aesthetics. Living Rooms and Formal Spaces:Light knockdown or skip trowel textures are great for this room because they offer elegance without making it feel too busy. These textures, which are applied with a trowel, add visual interest that goes well with furniture and decor. Bedrooms: For bedrooms, orange peel or light knockdown textures are best. They are subtle enough to make the room feel quiet and cover up little flaws in the walls that could show up in harsh light. Bathrooms and Kitchens: These regions are prone to dampness, so texture that can disguise water spots or little damage is helpful. But stay away from surfaces with a lot of texture that hold moisture and are hard to clean. A light orange peel is good. Hallways and High-Traffic Areas: Knockdown texture is perfect for areas that take abuse. The pattern hides scuffs from furniture, luggage, or everyday bumps better than smooth walls. Home Offices: Consider your video call background smooth or very subtle texture often looks more professional on camera than heavy, dramatic textures. How to Texture a Wall (Basic Overview) Many homeowners search how to texture a wall or

Read More »
Woman painting a composite deck surface, showing can you paint Trex decking for faded outdoor boards
Deck Staining
James Carter

Can You Paint Trex Decking? A Complete Homeowner’s Guide

After years of sun and rain, your lovely Trex deck has started to fade. You want to know if a new coat of paint could bring it back to life. When their composite decking loses its shine, a lot of homeowners ask this question. The quick answer? It’s hard, and most of the time, you shouldn’t do it. Let’s look closely at whether  can you paint your Trex decking, what happens if you do, and other ways to make your deck seem better. What Is Trex Decking? Trex is a kind of composite decking that is manufactured by mixing plastic and reclaimed wood fibers. It is made to last longer than genuine wood and not decay, get bugs, break, or get wet. Capped vs. Uncapped Composite Decking Understanding this is critical before you think about painting Trex decking: Most problems people face with painting Trex decking happen because they don’t know which type they have. What Are the Benefits or Drawbacks of Painting Trex Decking? You need to think about the good and bad things of Trex paintable very thoroughly. You can’t readily change your mind about this. The Benefits The Drawbacks Can Trex Decking Be Painted Safely? This is one of the most common People Also Ask questions and the answer depends on age and condition. If you’re asking “is Trex paintable?”, the honest answer is: technically yes, practically risky. Things to Consider Before Painting Your Trex Deck You need to do a “splash test” before you start. Put some water on your deck. Does it soak up? If so, you have an ancient deck that doesn’t have a cap and is a fantastic candidate for paint. You have a modern-topped deck if the water beads up and rolls off. It’s considerably tougher to paint capped Trex decking because the plastic shell is made to keep paint and other things out. Moisture Resistance and Surface Tension Composite decks are made to be resistant to dampness. This is fantastic for keeping things from rotting, but it’s a nightmare for paint to stick to. You need a high-quality primer made just for non-porous surfaces if you want the paint to stick. How to Clean Trex Decking Before Painting You cannot paint over dirt, mildew, or pollen. If you do, the paint will peel off within weeks. Preparation is 90% of the job. For a step-by-step instruction on the best chemicals and tools to use, see our article on How to Clean a Deck Before Staining. Cleaning the surface properly makes sure that the composite surface treatment sticks to the material. How to Prepare Trex Decking for Paint or Stain Another important topic for PPA is how to get a Trex deck ready for paint or stain. This is what that truly means: Light Sanding Test Area Always paint a small hidden section first. Wait a few days to see if it bonds. Dry Conditions Paint only when the deck is completely dry and weather is stable. What Kind of Paint Works on Trex Decking? If you’re going to paint, choose carefully. Best Paint for Composite Decking Like Trex Avoid oil-based paints. They don’t flex well and fail faster on composite surfaces. Steps to Paint Trex Decking (If You Decide to Proceed) If you have an older, uncapped deck and you’re ready to transform it, follow these steps to ensure the best results. 1. Sanding (Lightly!) Lightly scratch the surface using 120-grit sandpaper. This makes “teeth” that the primer can hold onto. Don’t sand newer capped decks since you’ll damage the protective shell. 2. Apply a High-Quality Primer Don’t use a cheap primer. You need an oil-based or a high-adhesion acrylic primer. This is the most important step in how to paint trex decking. 3. Choose the Best Paint A high-quality, solid-color acrylic deck stain or a “deck restorer” product is the ideal paint for composite decking like Trex. These are made to be flexible. The paint needs to be able to stretch without breaking since the deck moves when the temperature changes. 4. Application Use a brush for the gaps and a roller for the surface. Work in small sections to ensure an even coat. 5. Drying Time Patience is key. If you walk on it too soon, you’ll leave permanent footprints. You might be wondering, How Long Does Deck Stain Take to Dry? Typically, you should wait at least 24 to 48 hours before moving furniture back. Why Composite Decking Should Not Be Painted This deserves its own section because it’s the core reason professionals avoid it. This is why you shouldn’t paint modern Trex decking, even if it looks worn. Is Painting Trex Decking Worth It vs. Replacing? For most homes, replacement or restoration wins. Painting Trex decking: Replacing boards: Why Choose Us We at Inter Color Painting LLC believe in doing what’s best for your home, not just what’s easiest. Before any work starts, we assist homeowners in figuring out if painting, staining, or restoring is the best option.Our team has actual experience, honest advice, and proven outcomes if you’re seeking reliable Deck Staining Contractors in Seattle WA. Conclusion If you’re still not sure if painting, staining, or restoring your Trex deck is the best thing to do, seeking help from a professional can save you time and money. At Inter Color Painting LLC, we are glad to look at your deck and suggest the best long-term fix based on how old it is, how well it is maintained, and whether or not it is still under warranty. Contact us today to set up a meeting and get honest, professional advice that is specific to your house and yard. FAQs Can Trex decking be painted safely? Yes, the material is safe as long as you use water-based or suggested oil-based products. It doesn’t hurt the boards’ structural integrity. Does painting Trex decking void the warranty? Most of the time, painting the boards will void the fade and stain warranty on newer Trex products, including the Transcend series.

Read More »
Painting Tips
Roman Raees

How to Remove Arylic Paint

Have you ever been painting and suddenly noticed a big splash of acrylic paint on your favorite shirt? Or maybe you were working on a fun art project and now there’s paint all over your hands, carpet, or wooden table? Don’t worry – you’re not alone! Acrylic paint spills happen to everyone, from professional artists to weekend crafters. The good news is that most acrylic paint stains can be removed if you know the right tricks. In this complete guide, we’ll show you exactly how to get acrylic paint out of almost any surface. Whether the paint is still wet or has been dried for days, we’ve got solutions that actually work. We’ll cover everything from simple household items you already have to more advanced techniques for stubborn stains. By the end of this article, you’ll be a pro at acrylic paint removal and won’t panic the next time a spill happens. Let’s dive in and save your stuff! Understanding Acrylic Paint Before you try to wash off acrylic paint, you have to understand what it actually is. Acrylic is a water-based paint, but that is a bit of a trick. While it’s wet, it’s easy to handle. However, as it dries, it undergoes a chemical change called “cross-linking.” The acrylic polymer emulsion inside the paint turns into a flexible polymer film. This is essentially a layer of plastic. The copolymers in the paint create a bond that becomes water-resistant very quickly. In fact, the hardening time (30-60 minutes) is remarkably fast. If you don’t act within that window, you are no longer just washing you are trying to dissolve acrylic paint or strip acrylic paint entirely. Emergency Response Guide When you spill acrylic paint, the first few minutes are crucial. Acting fast can mean the difference between a quick cleanup and a permanent stain. Here’s your emergency action plan: Step 1: Don’t Panic, Don’t Rub The moment you notice paint on something, stop what you’re doing. Your first instinct might be to rub it away, but this actually makes things worse. Rubbing pushes the paint deeper into fabric fibers or spreads it across surfaces. Instead, stay calm and move to step two. Step 2: Blot Immediately Grab a clean cloth, paper towel, or even a napkin. Gently blot the paint stain from the outside edges toward the center. This prevents the stain from spreading. Keep blotting until you’re not picking up any more paint. If it’s on clothing, hold a clean cloth behind the stain while you blot from the front. Step 3: Rinse With Cold Water For fabrics and washable items, run cold water through the back of the stain. This pushes the paint out the way it came in. Hold the fabric under running water for at least 30 seconds. Don’t use hot water – it can actually create a heat-set stain that becomes permanent. Step 4: Apply Soap Work some regular dish soap or laundry detergent into the damp area. Gently massage it in with your fingers or a soft brush. Let it sit for 2-3 minutes, then rinse again. Repeat this process until the water runs clear. Essential Supplies to Keep Handy Smart painters always keep an emergency cleanup kit nearby. Here’s what you should have: Having these items within reach means you can tackle acrylic paint stain removal before it becomes a bigger problem. At Inter Color Painting LLC, we always tell our clients that preparation prevents permanent stains. Complete Solvent Guide Not all paint removers work the same way. Some are gentle and safe for delicate fabrics, while others are strong enough to strip acrylic paint from hard surfaces. Let’s break down your options from mildest to strongest. Household Solutions These everyday items work great for fresh paint and are safe for most surfaces: Soap and Water This is your first line of defense. Regular dish soap contains degreasing agents that break down the acrylic polymer. Mix warm water with a few drops of soap, apply it to the paint stain, and scrub gently. This works best within the first hour of a spill. Rubbing Alcohol Also called isopropyl alcohol, this is one of the best tools for removing dried acrylic paint. It dissolves the polymer film without being too harsh. Pour some on a cloth and dab at the stain. You’ll see the paint start to break down within a few minutes. This works on fabric, hard surfaces, and even your hands. White Vinegar Vinegar’s acidity helps soften acrylic paint. Heat a cup of white vinegar in the microwave for 30 seconds (not boiling), then apply it to the stain with a cloth. Let it soak for 5-10 minutes before scrubbing. This is especially good for natural textile fibers like cotton. Baby Wipes These are surprisingly effective for cleaning acrylic paint off your hands and quick surface cleanups. They’re gentle on skin and contain mild cleaning agents. Keep a pack in your painting area for immediate response to small spills. Moderate Strength Options When household items aren’t enough, try these: Ammonia Solution Mix one part ammonia with one part water. This combination dissolves acrylic gradually and works well on stubborn stains. Apply it to the paint stain, wait 10-15 minutes, then scrub with a brush. Always use ammonia in a well-ventilated area and never mix it with bleach – this creates toxic gas. Nail Polish Remover (Acetone-Free) Look for acetone-free formulas when dealing with fabric fibers or synthetic fabrics. These are gentle enough for clothes but strong enough to remove dried acrylic paint. Apply with a cotton ball and blot repeatedly. The acetone-free version won’t damage delicate materials. Window Cleaner Many window cleaners contain organic solvents that work on acrylic. Spray it on the paint stain, let it sit for a minute, then wipe away. This works well on glass, tile, and hard floors. Strong Solvents (Use With Caution) For really stubborn or old paint stains: Acetone This is one of the most powerful solvents for acrylic paint removal. It works

Read More »